What is Arch Linux
Arch Linux is a lightweight, and a free and open-source Linux distro that gives you immense customizability and control over your machine. The x86-64 centric Linux distro adheres to the KISS principle (keep it simple, stupid). As the name suggests, Arch believes in making the operating system a clean slate that leaves every decision to the user. You won’t find any significant distribution-specific changes in Arch, making the transition seamless from any other Linux distro.
Links
Lets get started!
Getting the image
To start off, you need to download the ISO image. On their website, they have mirror specific to your location. For me, I use the United States mirrors.
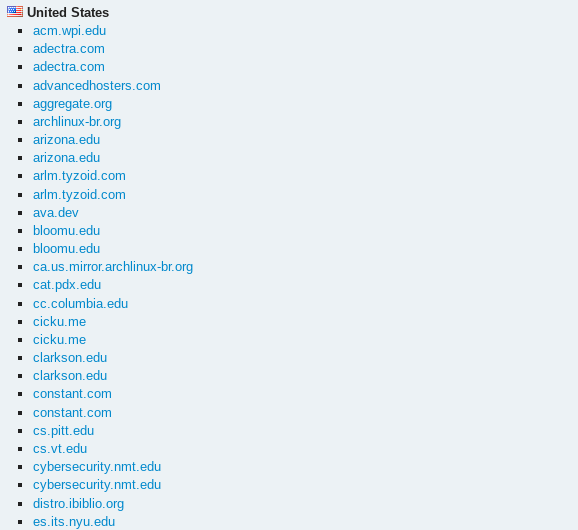
Select a mirror. After that, you can download the ISO file.
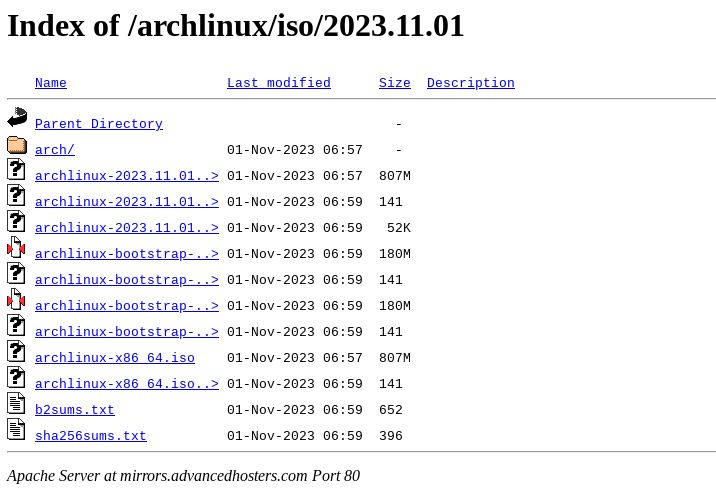
The ISO file is about 800MB, so it may take some time to download. For me, it took about 5 minutes on AT&T internet. In the meantime, you can download one of the tools that are used for flashing the ISO image
Flashing the image
There are a lot of ways you can make a bootable ISO image. For most users, it is best to use Rufus, as it’s more easier to use, plus it has some features that most tools don’t have. Keep in mind that this tool is only for Windows. The other tools I have listed in this post will depend on what OS you are using.
Booting the OS
Once you have flashed the image to a USB drive, you can now install Arch Linux. I’m going to be using a virtual machine, as it is the same thing to most other computers compatible with the OS. If you are installing it to a computer, you may need to look up on what key you use to get into the boot menu.
Turn on your computer, and plug in the USB drive. Since I’m using a virtual machine, I will use the boot menu key used on it. Select your USB drive, and press enter to boot it. Once you are in, you may see this screen.
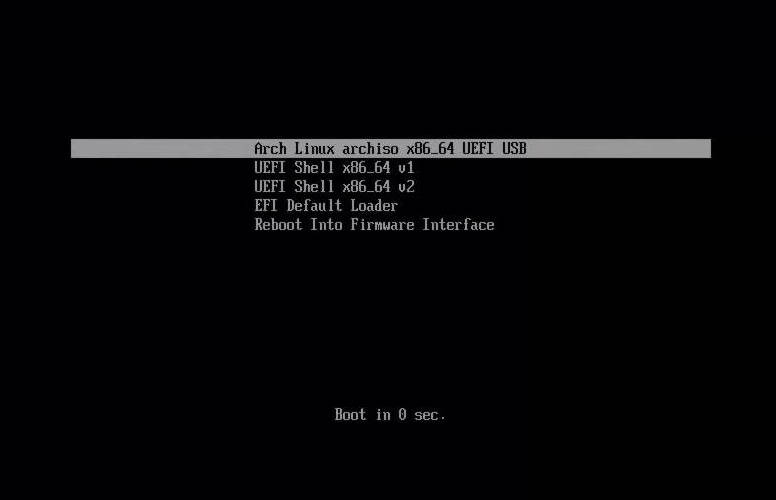
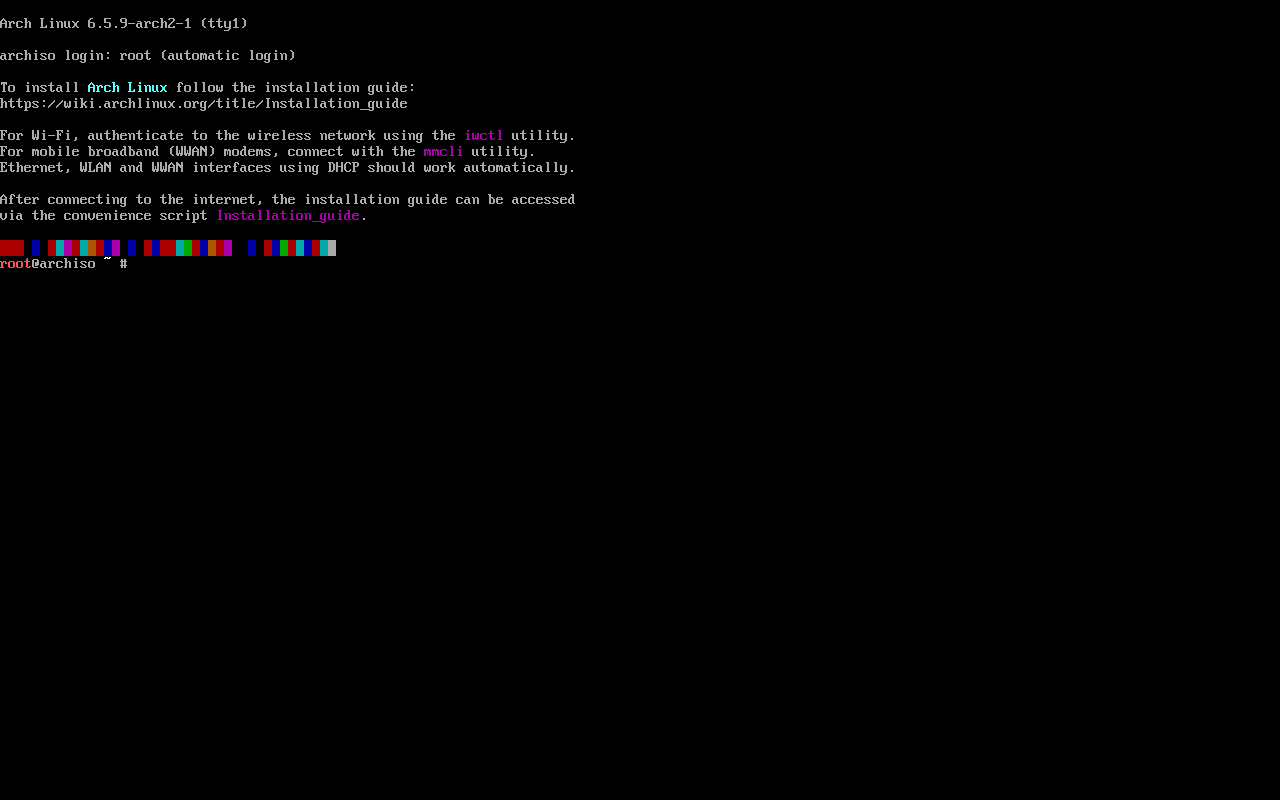
Press enter on the first option to boot into the USB. Give it some time to copy files to a RAM Disk. Once it is done, you will start off with a terminal screen.
Prepare your install
Connect to the internet
Connect the Ethernet cable to your computer. You should get internet from DHCP from your router. If you use a different configuration, look up on how to do that. This tutorial will use DHCP. If you want to use a static IP, open this link to the Arch Linux wiki and follow the guide on how to do that.
For users that use Wi-Fi, click here. For users that use Ethernet, you should be fine, but you may need to setup DHCP or static IP to get your IP address.
You can look here on setting up static IP’s!
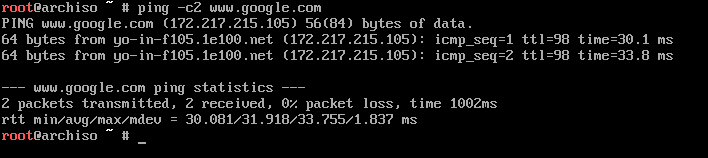
If you are able to get internet, you should do a ping test to be sure you can get packages. Using the command below will ping Google.
$ ping -c2 www.google.com
Partiton your disk
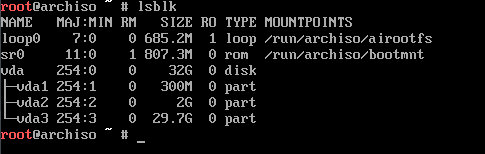
It’s time to partition the disk. To start off, we’re going to list the disk we will use. For me, I have a 32GB Disk in my virtual machine, and it’s device name is vda. So I will use that. You can list disks using one of these commands
$ cat /proc/partitions
$ ls /dev/[s|x|v]d*
$ lsblk
$ fdisk –l
Let’s go over the disk layout. Here’s is what we need:
| Name | Size | Format |
|---|---|---|
| EFI System | 300M | FAT32 |
| Swap | RAM | Swap ON |
| Root | HDD | ext4 |
Now we can start partitioning the disk. Run the “cfdisk” utility to do that.
$ cfdisk /dev/sdX
Replace X with your drive name.
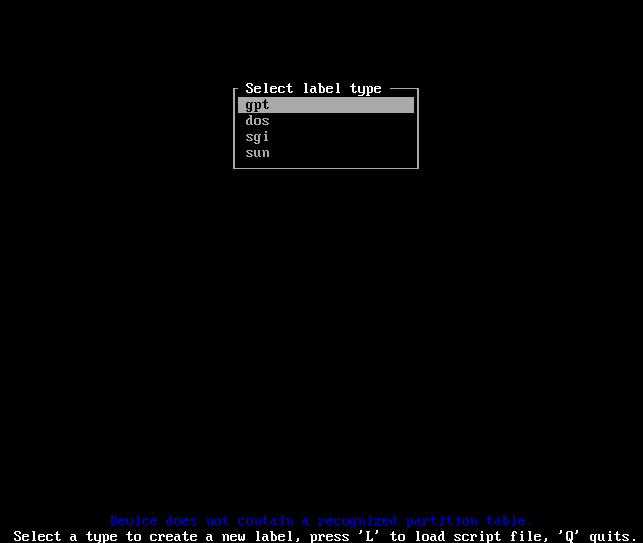
Select the GPT label on this screen. Once done, you should see something like this.

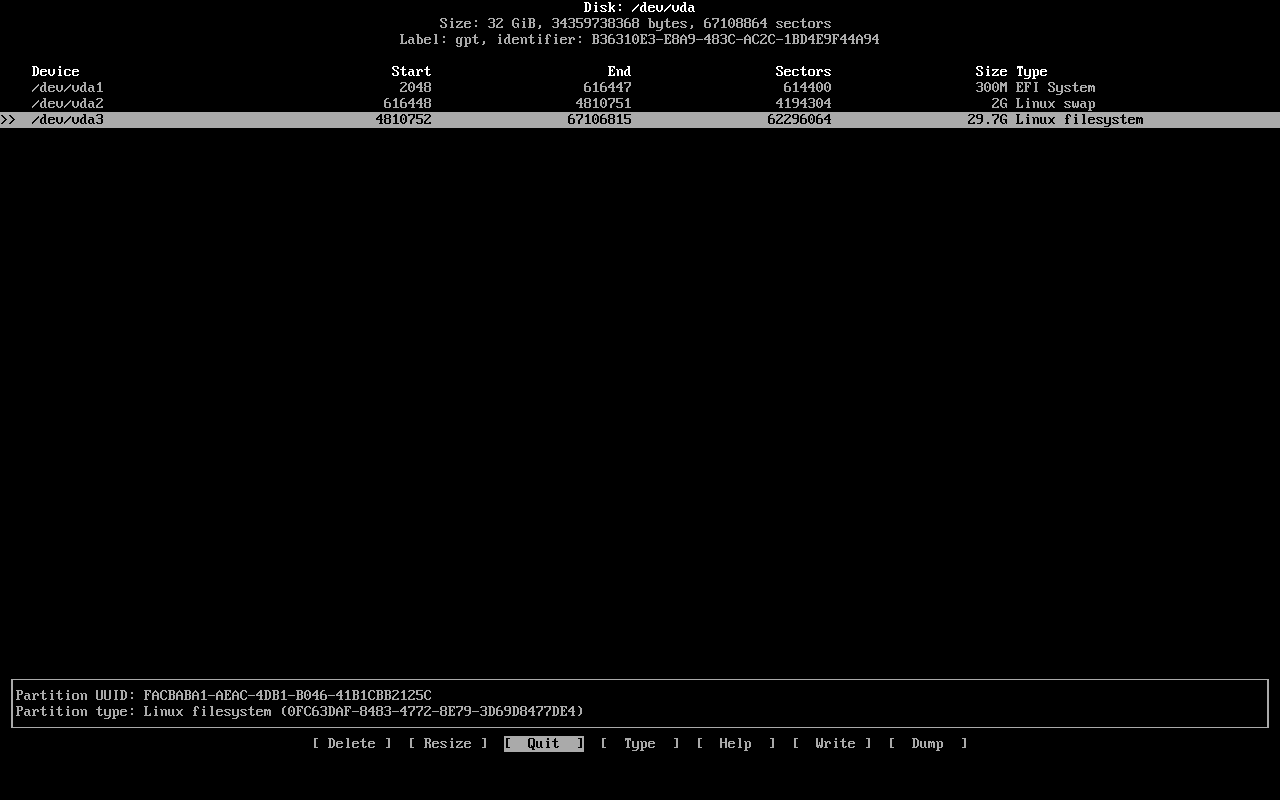
Do the following here:
New —> 300M —> Type —> EFI System
New —> RAM SIZE —> Type —> Linux Swap
New —> HDD Size
You should have the layout like this:
You can now write your changes to the disk. To do so, follow this step.
Write —> Type yes —> Quit
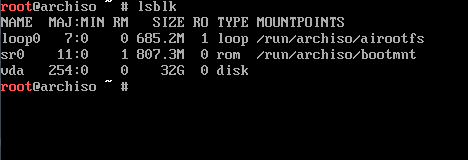
When done, quit the app. To be sure you have everything correct, type this command.
$ lsblk
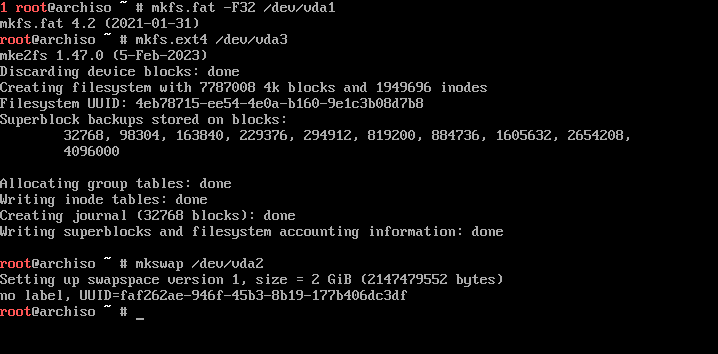
It’s time to format the partitions! Type these commands in. Remember to change sdX with your device name.
$ mkfs.fat -F32 /dev/sdX1
$ mkfs.ext4 /dev/sdX3
$ mkswap /dev/sdX2
Mount the partitions
Before we proceed, let’s mount the partitions needed for install. Type these commands to do so.
$ mount /dev/sdX3 /mnt
$ ls /mnt
$ swapon /dev/sdX2

Install the packages
Let’s begin. To install, we need to use the pacstrap command. This is so we can get the Linux base components. Use the command to do so.
$ pacstrap /mnt base base-devel linux linux-firmware nano vim dhcpcd
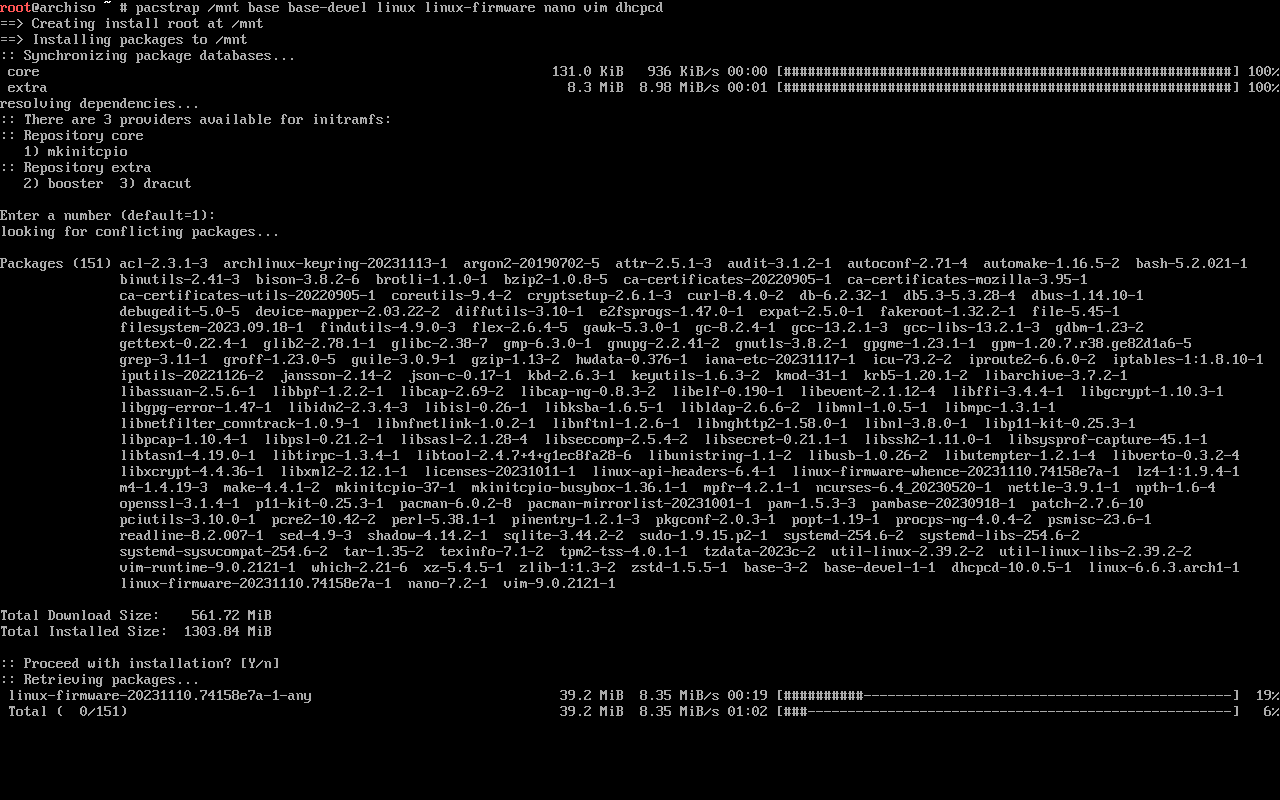
Depending on your internet speed, it take about an hour to finish up. Once done, create the fstab file. To do this, type this command.
Generate your fstab
$ genfstab -U -p /mnt >> /mnt/etc/fstab
To check it, type this command
cat /mnt/etc/fstab
Configure your system
Let’s configure the system. First off, we need to chroot into the root partition.
$ arch-chroot /mnt
Add your hostname
Let’s add a hostname. You may change it however you please.
$ echo "archlinux" > /etc/hostname
Setup your keyboard
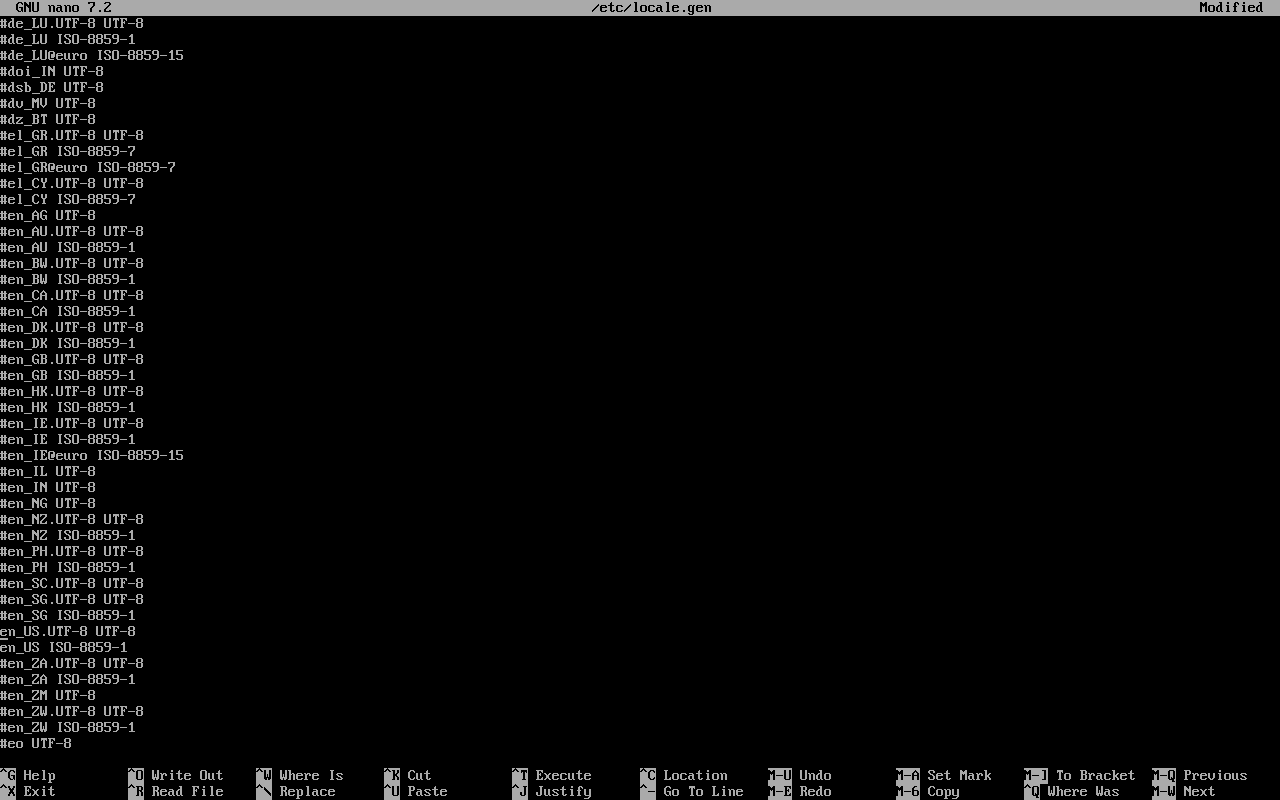
Now we need to add the locale for our keyboard. Type this command. Be sure to have nano installed.
$ nano /etc/locale.gen
For me, I use en_US, so I will select that. If you know which one, uncomment that line and save the file.
After that, type in these commands. If your configuration is different, change the lines for the LANG variable based on your keyboard layout.
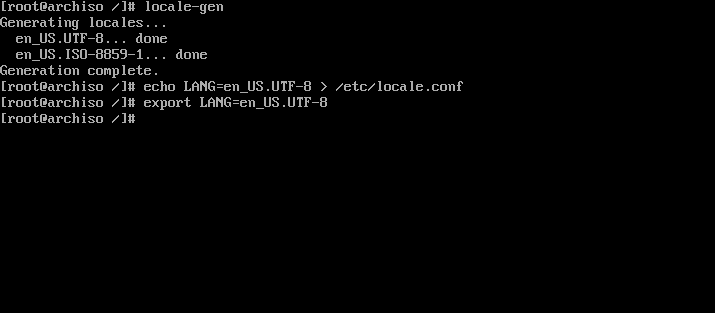
$ locale-gen
$ echo LANG=en_US.UTF-8 > /etc/locale.conf
$ export LANG=en_US.UTF-8
Set your time zone
You should also set your time zone. For me, I live in the Eastern Time Zone, so I will use a city based on that. You can specify on your time zone based on where you live. You can search one with the first command below.
$ ls /usr/share/zoneinfo/
$ ln -s /usr/share/zoneinfo/Continent/Main_city /etc/localtime

Check for upgrades
Make sure that your system is up to date as well. This may be needed for some cases. You can run this command after installation if you want.
$ pacman -Syu
Configure the root account
Now set a password for the root account. You should also create your own account and add a password to that as well.
$ passwd
Create your user account
$ useradd -mg users -G wheel,storage,power -s /bin/bash your_new_user
$ passwd your_new_user
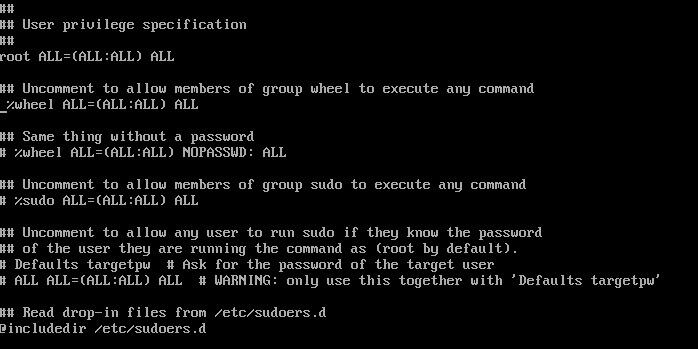
We should also setup sudo. To do this, type this command. The picture will show you how to do this step.
$ nano /etc/sudoers
Wrapping up
Our last step is to install the grub bootloader. Install these packages first.
$ pacman -S grub efibootmgr dosfstools os-prober mtools
Then you need to mount the boot partition and create a EFI folder inside it. Once that is done, you can install the grub bootloader
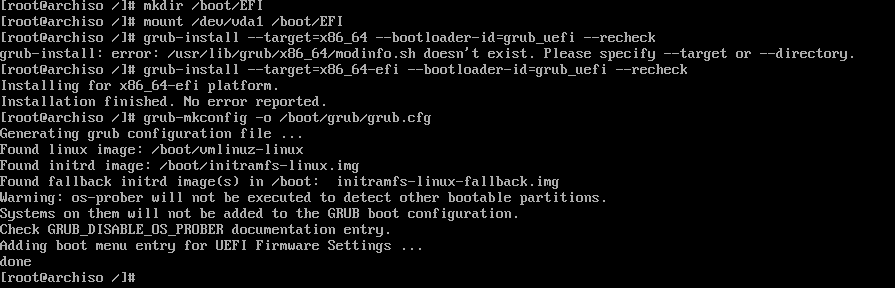
$ mkdir /boot/EFI
$ mount /dev/sdX1 /boot/EFI
$ grub-install --target=x86_64-efi  --bootloader-id=grub_uefi --recheck
After that, you can create the configuration file.
$ grub-mkconfig -o /boot/grub/grub.cfg
Finally, enable the DHCP server service on boot. You don’t have to do this step if you are using a static IP.
$ systemctl enable dhcpcd
Reboot your system
Congrats! You have Arch Linux installed on your computer! To restart, exit out of the chroot environment, and then reboot
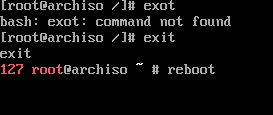
$ exit
$ reboot
Conclusion and final notes
In general, installing is very different from what we are used to seeing today. However, the OS is very lightweight, and easy to use. You can treat as a linux OS, any way you like.